Juliano's - 800-300-1932
Juliano's
55 Chevy 3 Point Seat Belt How-to
3-Points
for 55 Chevy
by Jeff Juliano
|
The more we learn about cars and safety, the more we realize the
importance of a three point shoulder harness seat belt. If you travel with family
members or other loved ones, it is a good idea to make sure everyone is strapped
in. This article shows exactly how you would go about installing Juliano's shoulder
harness seat belts in a 55 Chevy.
|
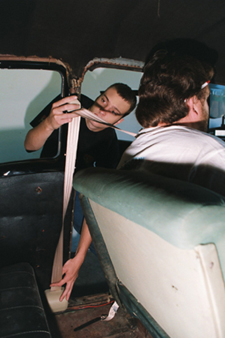 |
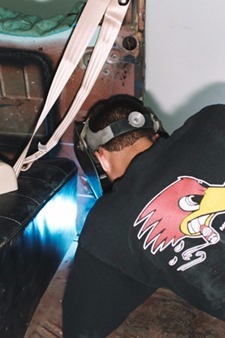
The first thing you want to do is position the retractor and the third point
with
someone in the drivers seat to make sure it is comfortable. This enables
you to get an idea where these two points will get mounted |
|
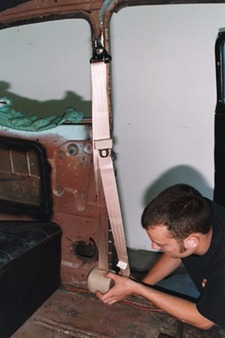
Next I had to mount the shoulder
bracket. The bracket can be trimmed so I marked where we need to cut the bracket.
I also marked the B pillar so we know where to cut it to weld the plate in.
|
|
 |
Here
is what the bracket looks like after we trimmed it. When trimming the brackets
just remember not to get close to the welds.
|
Next we have to cut a little bit out of the B pillar
so we can weld in our bracket.
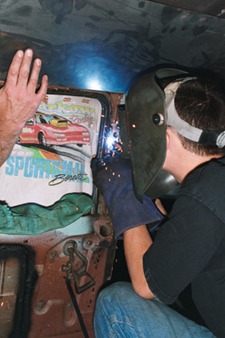
If you have interior parts that you don't want
to get burned you should cover
them. Here I have someone covering the headliner.
|
|
|
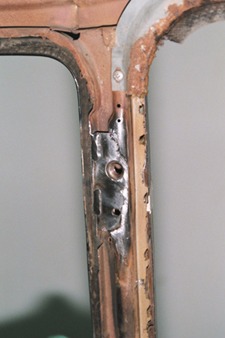
After your plate is trimmed and the B pillar is cut, it is time to weld the
bracket
in place. I clamped it where I wanted it first, and then tacked
it to make sure
it stayed in place. Then I welded the rest of it.
|
|
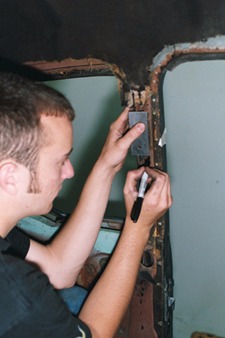
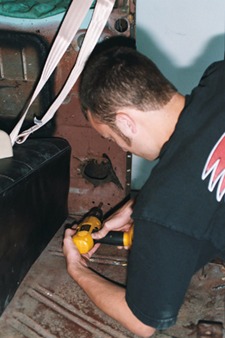
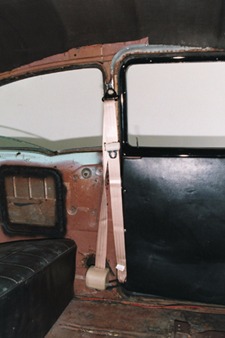
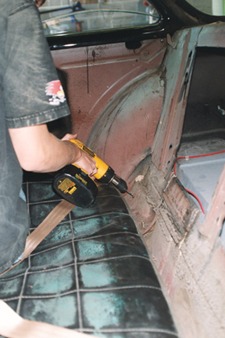
After I welded in the bracket and cleaned up the welds with a body grinder then
bolted the belt in on the top. The next step is to decide where you're going to
mount the retractor.
|
|
|
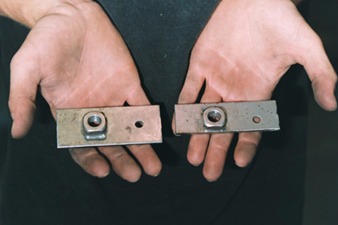
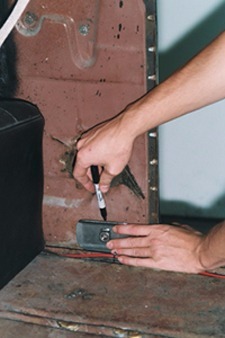
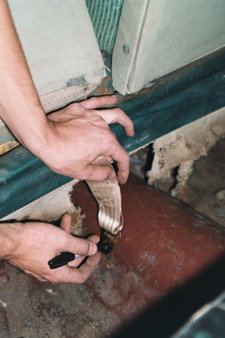
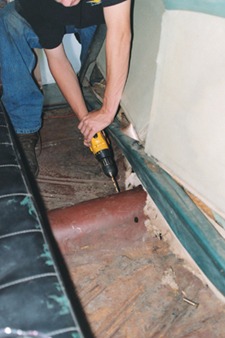
I decided to bolt the retractor to the dogleg area of the car rather than to the
floor. We recommend this way if it is possible, because it doesn't get in the
way of rear passengers. Once you find a good location, mark the area. I then drilled
three holes. The two outer holes are plug weld holes for the anchor plate. This
is achieved by striking an arch in the center of the hole (on the anchor plate)
and working it to the outside of the hole until it flows onto the sheetmetal.
I put the plate behind the sheetmetal, and weld the bracket to the car. The center
hole is the bolt hole to bolt the retractor to the car.
|
|
 |
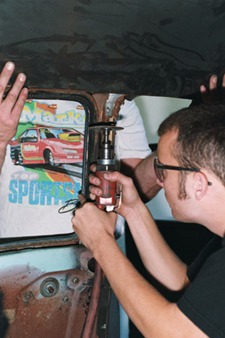
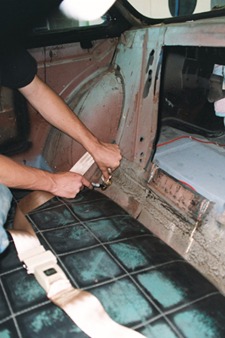
Now
that the retractor and shoulder brackets have been installed, your next step is
to install the other side. The fixed end of the belts install very easily. Just
mark the hole where you want it, keeping in mind the seat will be sliding back
and forth.
|
 |
 |
After you mark the holes and drill them, you can bolt them
to the floor. When
using an anchor plate on the bottom of
the floor, make sure it won't interfere
with anything in the
drivetrain of your car. After the fixed arms are all bolted
in
your front 3 point shoulder harness belts are installed. Now
for the rear lap
belts.
|
 |
 |
Installing the back belts is just like installing the fixed portion of the 3pts.
Just mark where the belts will go. Make sure there is enough room for anchor plates
behind the floor. Drill the holes and bolt them in.
|
|
|
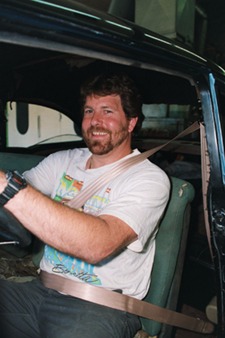
You have successfully installed seat belts in your car! Now you
can take the whole family out and feel safe about it.
|
For Technical Assistance or Questions Call
860-872-1932