VW 3 Point Seat Belt How-to
Juliano's
VW 3 Point Seat
Belt How-to
Makin'
Points
by Ed Kania
Making points with your mate ranks right up there
with
making brownie points with your boss. You get a few "at-a-boys", and
you feel as if you've gained some points so that the next time you
screw-up, they won't come down on you so hard. All in all it's a good
thing; a short term good thing, but, still its a good thing. Now if you
want to score some really big points with the people you care about,
let's start talking about "safety points".
This article is directly aimed at you people out
there that are driving around day after day in some of the coolest
looking older "Beetles" we've ever seen. You know who you are. We're
talking about you "Volksters" who spend weekend after weekend makin' em
shine. But you're still buckling up with a two-point lap belt system
before you go out crusin'. Now, don't get us wrong. It's a lot better
than nothing. Its just that adding that all important third point
(shoulder pivot bracket) is so easy, and looks so cool, we can't figure
out why you haven't installed them yet! Oh! No one's showed you how!
Well read on me'bucko. You're about to get a step by step.
Many auto manufacturers first offered lap belts
as
an option back in 1955. But it wasn't until 1959 that the general
public would see a car roll off the assembly line with a three-point
shoulder safety harness factory installed. That claim to fame belongs
to the "safety first" people at Volvo. Ever since that day, auto
manufacturers have been redesigning that system to make it more
comfortable and more eye appealing. Some manufacturers went to great
lengths to make sure the device was used by installing a track along
the roof line for the shoulder belt to automatically strap you in (you
know, the one that would scare the *!#* out of you as soon as you
closed the door). But the one thing the manufacturers have not changed
in all these years is the basic three point anchoring design. This is
definitely an area where more is better, and if you peek into most of
the competition vehicles out there you'll see a six point anchoring
system. But let's face it. If you had to put that contraption on every
time you climbed in, it would never get used.
Before we start the installation, there are two
things we cannot stress enough. Number one: a chain is only as strong
as its weakest link. If even one of the three mounting points is bolted
to a weak, rusted, or thin area, the system will never hold in place on
impact. Make sure the metal is strong and use anchor plates instead of
a washer/nut combination in these areas. Number two: keep comfort in
mind. If the shoulder strap is cutting into your neck, you won't want
to use it, and the installation will be for nothing.
OK, lets get going; it's
time to "modernize"!
|
-
NOTE -
Click to view larger
image of photos bellow.
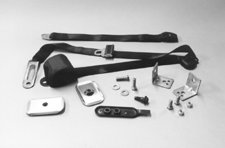 |
What you see pictured here is Juliano's 3-point retractable safety
belt, including all the hardware needed to securely anchor one person
in place. Keep this in mind when placing your order. Also, in this
photo the buckle strap is what's known as a "soft arm". It's typically
used with a bench seat or any other tight quarter's installation. In
this article we'll be using a "stiff arm", which you'll see during the
installation of the final mounting point. But keep in mind the soft arm
is available, and it comes in different lengths.
|

|
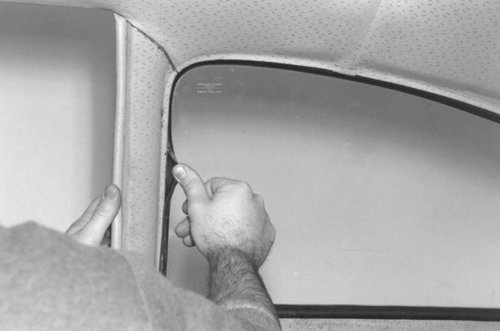
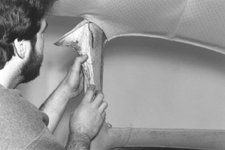
Although there is only one location for the pivot brackets anchor
plate, there's a couple of ways to get to it. During a restoration,
this install is done before the interior goes back in. But if the
interior is in place, the easiest way to get it out of the way is to
just take out the side glass. Just push the inner part of the rubber
weather-strip to the outside of the pinch-weld (keep one hand on the
outside of the glass). Once the glass weather strip is out of the way,
you can expose the inner sheet metal without cutting or tearing the
interior. An auto glass shop can easily reinstall your glass if you're
not familiar with the old "rope and glass cleaner" method.
|
|
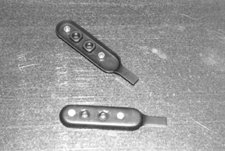
The pivot brackets anchor plate has to be mounted to the inside of the
"B" pillar. To keep it there you can use self-tapping sheet metal
screws, or tack-weld it in place. Because of possible spark damage to
the interior, we decided to tack-weld two nuts to the backside of the
anchor plate.
|
|
|
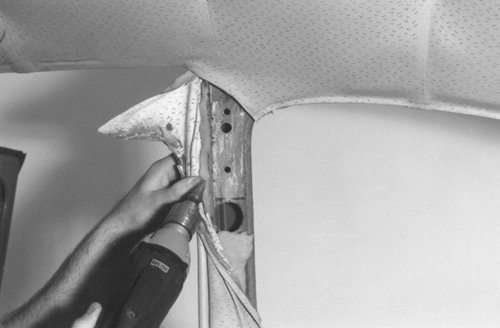
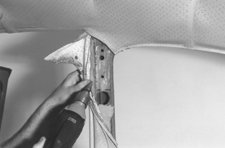
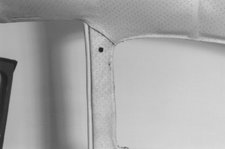
The pivot brackets anchor plate comes with two threaded pivot bolt nuts
welded to it. You can use either one to get the job done. Place the
anchor plate on the center of the pillar, about an inch and a half
below the roofline, and make 4 marks: one for the pivot bolt, two for
the retaining screws, and one to mark the bottom of the anchor plate
(do not include the anchor plate tab in this measurement). Then using a
uni-bit, or a deep well socket over a conventional drill bit to prevent
damage to the outside panel, go ahead and drill out the mounting holes.
The large inch and five-eighths access hole was drilled just under the
mark we made to locate the bottom of the anchor plate. We'll slide the
anchor plate through it to get to the inside of the pillar.
|
|
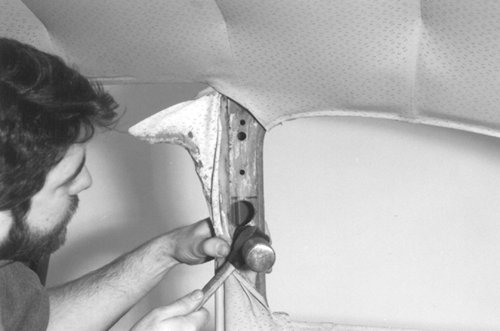
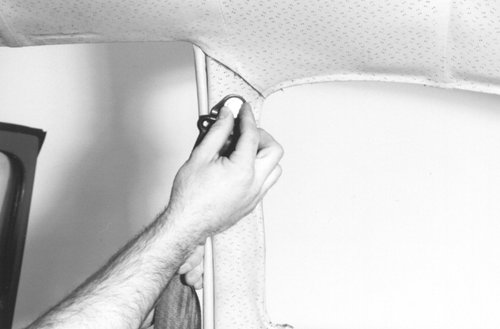
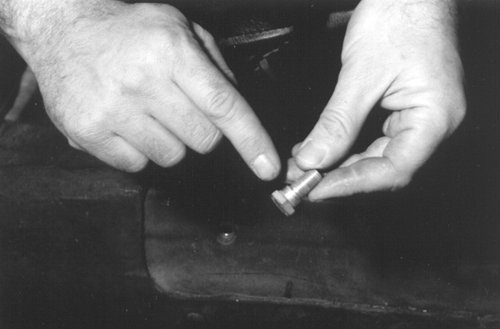
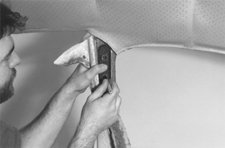
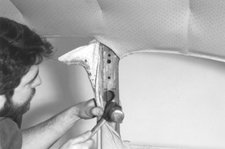
Using a ball-peen hammer set the lower half of the access hole in about
a quarter of an inch. This will make it a little easier to slide the
anchor plate through. Then, with the shanked pivot bolt (provided in
the kit) in one hand, grab a hold of the anchor plate tab with the flat
side of the plate facing you, and slide it up into place.
|
|
|
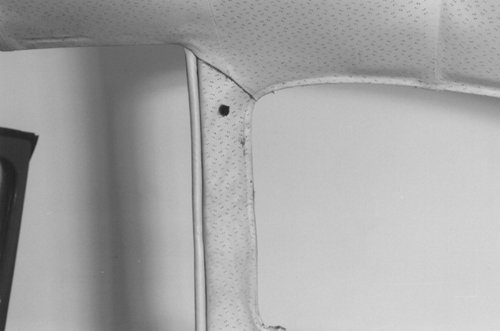
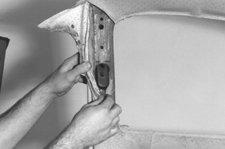
Being very careful so as to not drop the plate (help from a friend
might be a good idea), temporarily screw the pivot bolt in to hold the
plate, while you permanently screw in the retaining screws. Then remove
the pivot bolt, glue the interior back in place, and cut a small hole
in it for the pivot bolt to pass through.
|
|
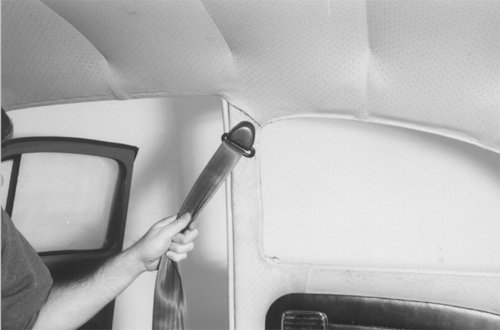
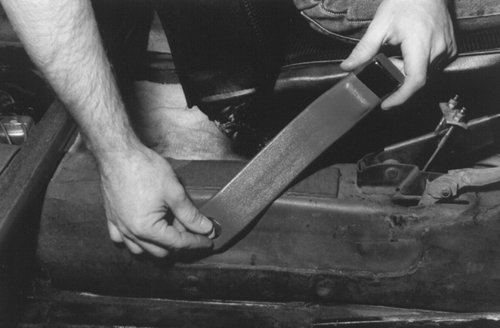
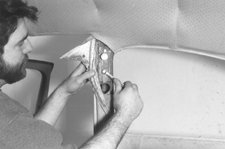
With the flat side of the pivot bracket against the interior, bolt it
to the anchor plate using the shanked pivot bolt supplied. The hole in
the bracket must ride on the shank portion of the pivot bolt. If
installed properly, with the pivot bolt tight, the belt should move
freely.
|


|
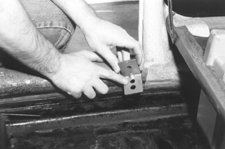 |
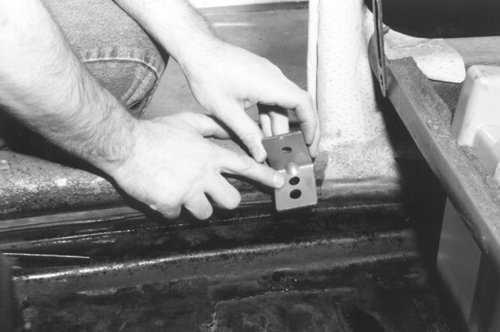
Next we move to the second mounting point, this is where we'll mount
the retractor assembly. Take out one of the "L" brackets that are
supplied in the kit. You'll notice that there are two holes in it. In
order to get the anchor plate to fit flat in the valley under the floor
pan, we had to relocate one of those mounting holes. Drill a new anchor
plate bolt hole to the inside of the original one as shown in the photo
above.
|
|
Next we bolted the "L" bracket to the back of the retractor with the
opposite end (the slotted belt bracket) of the belt sandwiched in
between. Keep both strips of webbing flat (no twist in the webbing) and
make sure the new hole you drilled in the "L" bracket ends up directly
under the center of the retractor.
|
 |
 |
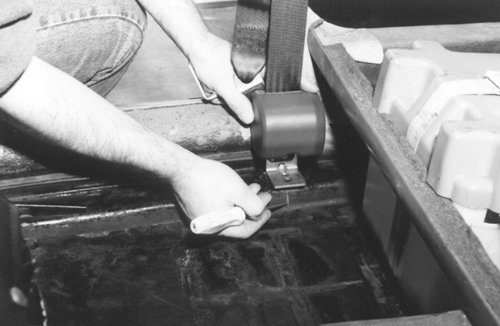
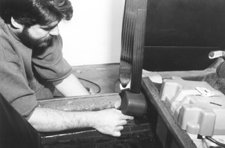
Now, with the complete assembly hanging vertically, and making sure the
two strips of webbing are flat (no twists) and running almost parallel,
we placed the retractor down ("L" bracket first) just under the rear
seat frame. Keep the belt away from the seat as much as possible and
the "L" bracket centered on the flat step of the floor pan as shown. We
marked the location of the new mounting hole we drilled on the floor,
and drilled a 7/16-inch hole.
|
| Keeping the flat side of the
anchor plate (supplied in the kit) against the underside of the floor,
we ran the grade-eight fine thread 7/16-inch bolt though the "L"
bracket and floor hole, and bolted it to the anchor plate. |
|
 |
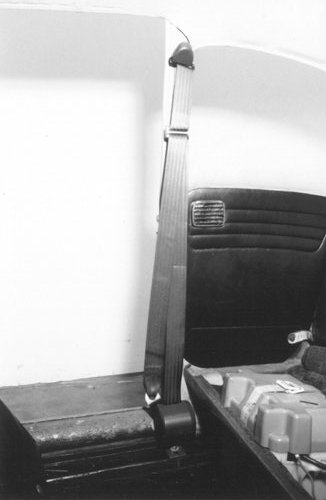
With everything socked up tight the final assembly should look like
this, all the webbing straight, flat and moving freely. |
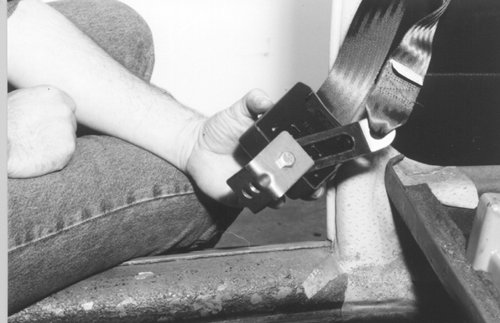
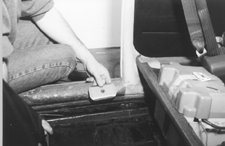
| The final or third mounting
point in this installation was simple. In order to mount Juliano's
"stiff arm" buckle we were able to use the original mounting location
(at the center of the floor pan) and hardware. |
 |
 |
The only modification needed was to file out the mounting hole in the
buckle arm, to the diameter of the shank portion of the original VW
seat belt bolt. If your particular installation has no original
hardware in this area, Juliano's anchor plate system will be necessary.
Just make sure you have the seat bolted in place to find the exact
location of the mounting point. |
|