Juliano's
Jumbo Door Check
How-to
 |
Juliano's jumbo door checks are a safe way to route wires in and out of
the doors for power windows, lights, speakers, etc., and to check the
door travel. What you see pictured here is everything that comes in the
kit. It's all the hardware needed when the original doorstop brackets
are being used. The first thing to check is the gap between the
original upper and lower doorstop brackets. There has to be a 5/16-inch
gap between them. If there is, you're all set. Just make sure there's a
hole drilled in-between them for the wires to pass through. If there
isn't a 5/16-inch separation, you have two routes you can take. The
first one is the easiest: modify the original doorstop brackets.
|
-
NOTE -
Click to view larger
image of photos bellow.
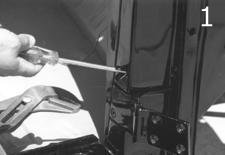 |
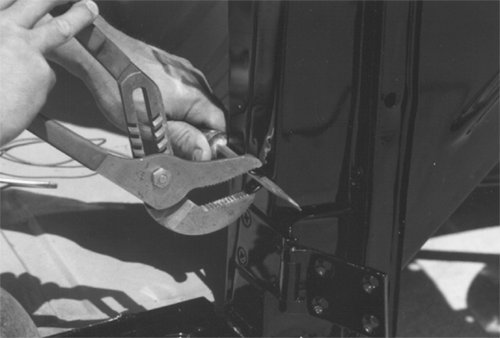
Take a flat pry-bar and
spread the brackets apart.
|
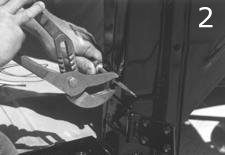
Using a section of round stock or any
other metal object with a 5/16-inch
diameter as a spacer, take a pair of
channel lock pliers and crimp the
brackets around it.
|
 |
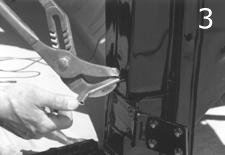 |
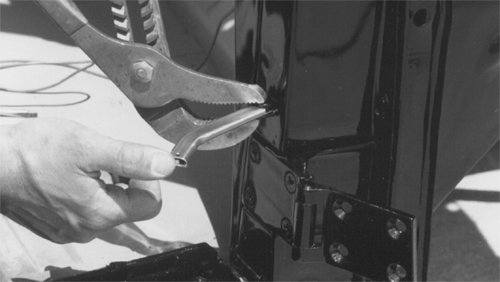
It is possible to use the jumbo door
check as a spacer for the final fit,
but don't squeeze too hard. You might
damage the door check.
|
|
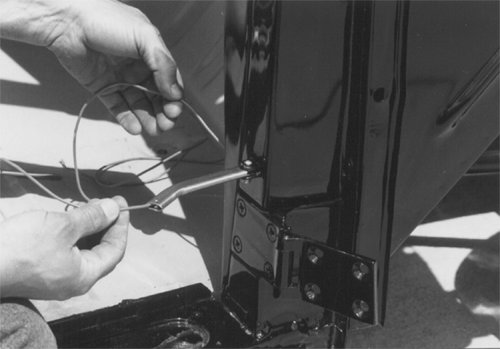
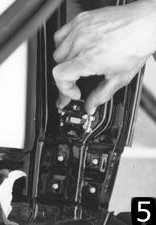
Using the screw and lock nut provided in the kit, mount the door check
in place with the hooked end turning out. If you are running wires
through the door check, now is the time to push them through. You need
to make sure that the wire hole between the brackets, is big enough to
allow the wires to move freely without rubbing during the opening and
closing operations of the door.
|
 |
 |
The next step is to pass the door check through the hole in the
doorframe. Some filing may be necessary to enlarge the original hole.
In this installation we had to drill out and remove the original
doorframe bracket to get the door check to pass through. Once the door
check is sliding freely within the doorframe, close the door half way
and install the rubber bumper. To do that, slide the large rubber
washer onto the portion of door check that is inside the door. Then
slide the metal washer on, and finally, insert the cotter pin in the
hole at the end of the door check to keep them all in place.
|
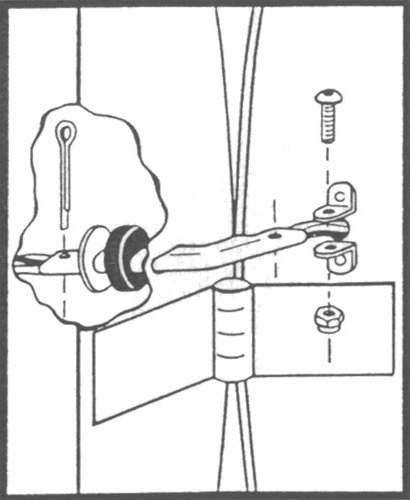
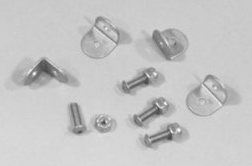
| If the
original doorstop brackets cannot be modified, or if some other type of
bracket is being used, it will be necessary to purchase a Juliano
"bracket kit" as shown here. |
 |
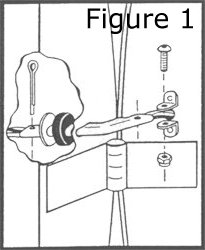 |
Then as shown in figure 1, mount two of the "L" brackets, facing each
other, to the center of the cowl side of the jamb first. Keep in mind
that their mounting area must also be in a good spot for the door check
to pass through on the doorframe side. Mount them 5/16-inch apart and
drill a wire pass-through hole between them. Mark the center of that
hole on the door frame side of the jamb. To each side of that mark
drill two 5/16-inch holes. They should be 3/8-inch apart (center to
center) and horizontal. File out the center, to form an oval hole for
the door check to pass through and repeat steps
4 and 5 to complete the installation.
|